How to Install Boat Flooring: A Comprehensive Guide
HarryKC
Installing boat flooring is a crucial project that can enhance the aesthetic appeal, comfort, and functionality of your vessel. Whether you're looking to upgrade an old, worn - out floor or installing flooring in a new boat, a well - executed installation can make a world of difference. This detailed guide will walk you through every step of the process, ensuring a professional - looking result.
1. Preparation: Laying the Groundwork
1.1 Measure Your Boat
The first and most important step is to accurately measure the area where you'll install the flooring. Use a tape measure to determine the length and width of each section of the boat's interior. For irregularly shaped areas, break them down into smaller, more manageable geometric shapes (such as rectangles, triangles) and measure each part separately. Sketch a rough diagram of the boat's floor layout and note down all the measuremens. This will help you calculate the amount of flooring material you need and ensure a proper fit.
1.2 Choose the Right Flooring Material
There are several types of flooring materials suitable for boats, each with its own advantages and characteristics.
• EVA Foam: This is a popular choice due to its durability, comfort, and slip - resistance. EVA foam flooring comes in a variety of colors and patterns, allowing for customization. It's also easy to clean and resistant to water, UV rays, and mildew. You can customize your EVA foam boat flooring from Hzkaicun.
• Marine Carpet: Marine - grade carpet offers a soft, comfortable surface. It can help reduce noise and provide insulation. However, it requires more maintenance than EVA foam and may retain moisture if not properly dried, potentially leading to mold growth.
• PVC Vinyl: PVC vinyl flooring is known for its toughness and ease of maintenance. It's available in different styles, including those that mimic the look of wood or stone. PVC vinyl is water - resistant and can withstand heavy foot traffic.
Consider factors such as your budget, the intended use of the boat (fishing, leisure cruising, etc.), and your personal aesthetic preferences when choosing the material.
1.3 Gather the Necessary Tools
To install boat flooring successfully, you'll need the following tools:
• Measuring tape
• Utility knife or sharp scissors (for cutting EVA foam or vinyl)
• Carpet cutter (if using marine carpet)
• Adhesive (specifically designed for marine use, check the manufacturer's recommendations for your chosen flooring material)
• Roller or trowel (for applying adhesive evenly)
• Masking tape
• Heat gun (for shaping and fitting flooring around curves and corners, especially with materials like EVA foam)
• Pencil or marker for marking measurements
• Safety gear, including gloves and goggles
2. Installation Process
2.1 Prepare the Surface
Before installing the new flooring, the boat's existing floor must be thoroughly cleaned. Remove any debris, dirt, or old adhesive remnants. Use a degreaser and a stiff - bristle brush to scrub the surface, especially in areas where there may be oil or fuel spills. Rinse the floor with clean water and allow it to dry completely. Any moisture left on the surface can cause the new flooring to bubble or not adhere properly.
If the old flooring is damaged or uneven, you may need to repair or level the surface. Fill any holes or cracks with marine - grade epoxy or filler and sand the area smooth.
2.2 Create Templates (Optional but Recommended)
If your boat has complex shapes or curves, creating templates can significantly improve the fit of the flooring. You can use cardboard, paper, or thin plastic sheets to create templates of each section of the floor. Trace the outline of the area onto the template material, cut it out, and then test - fit the template in the boat. Make any necessary adjustments until the template fits perfectly. This step can save you a lot of time and material by ensuring accurate cuts of the actual flooring.
2.3 Cut the Flooring Material
Using your measurements and templates (if applicable), carefully cut the flooring material to size. When cutting EVA foam or vinyl, use a sharp utility knife or scissors and make slow, deliberate cuts. For marine carpet, a carpet cutter works best. If you need to make curved cuts, a heat gun can be used to soften the material (in the case of EVA foam or vinyl) and make it more malleable for a precise fit.
2.4 Apply the Adhesive
Apply the marine - grade adhesive to the boat's floor using a roller or trowel. Start from one corner and work your way across the floor in a systematic manner, ensuring an even layer of adhesive. Follow the manufacturer's instructions regarding the amount of adhesive to use and the drying time before laying the flooring.
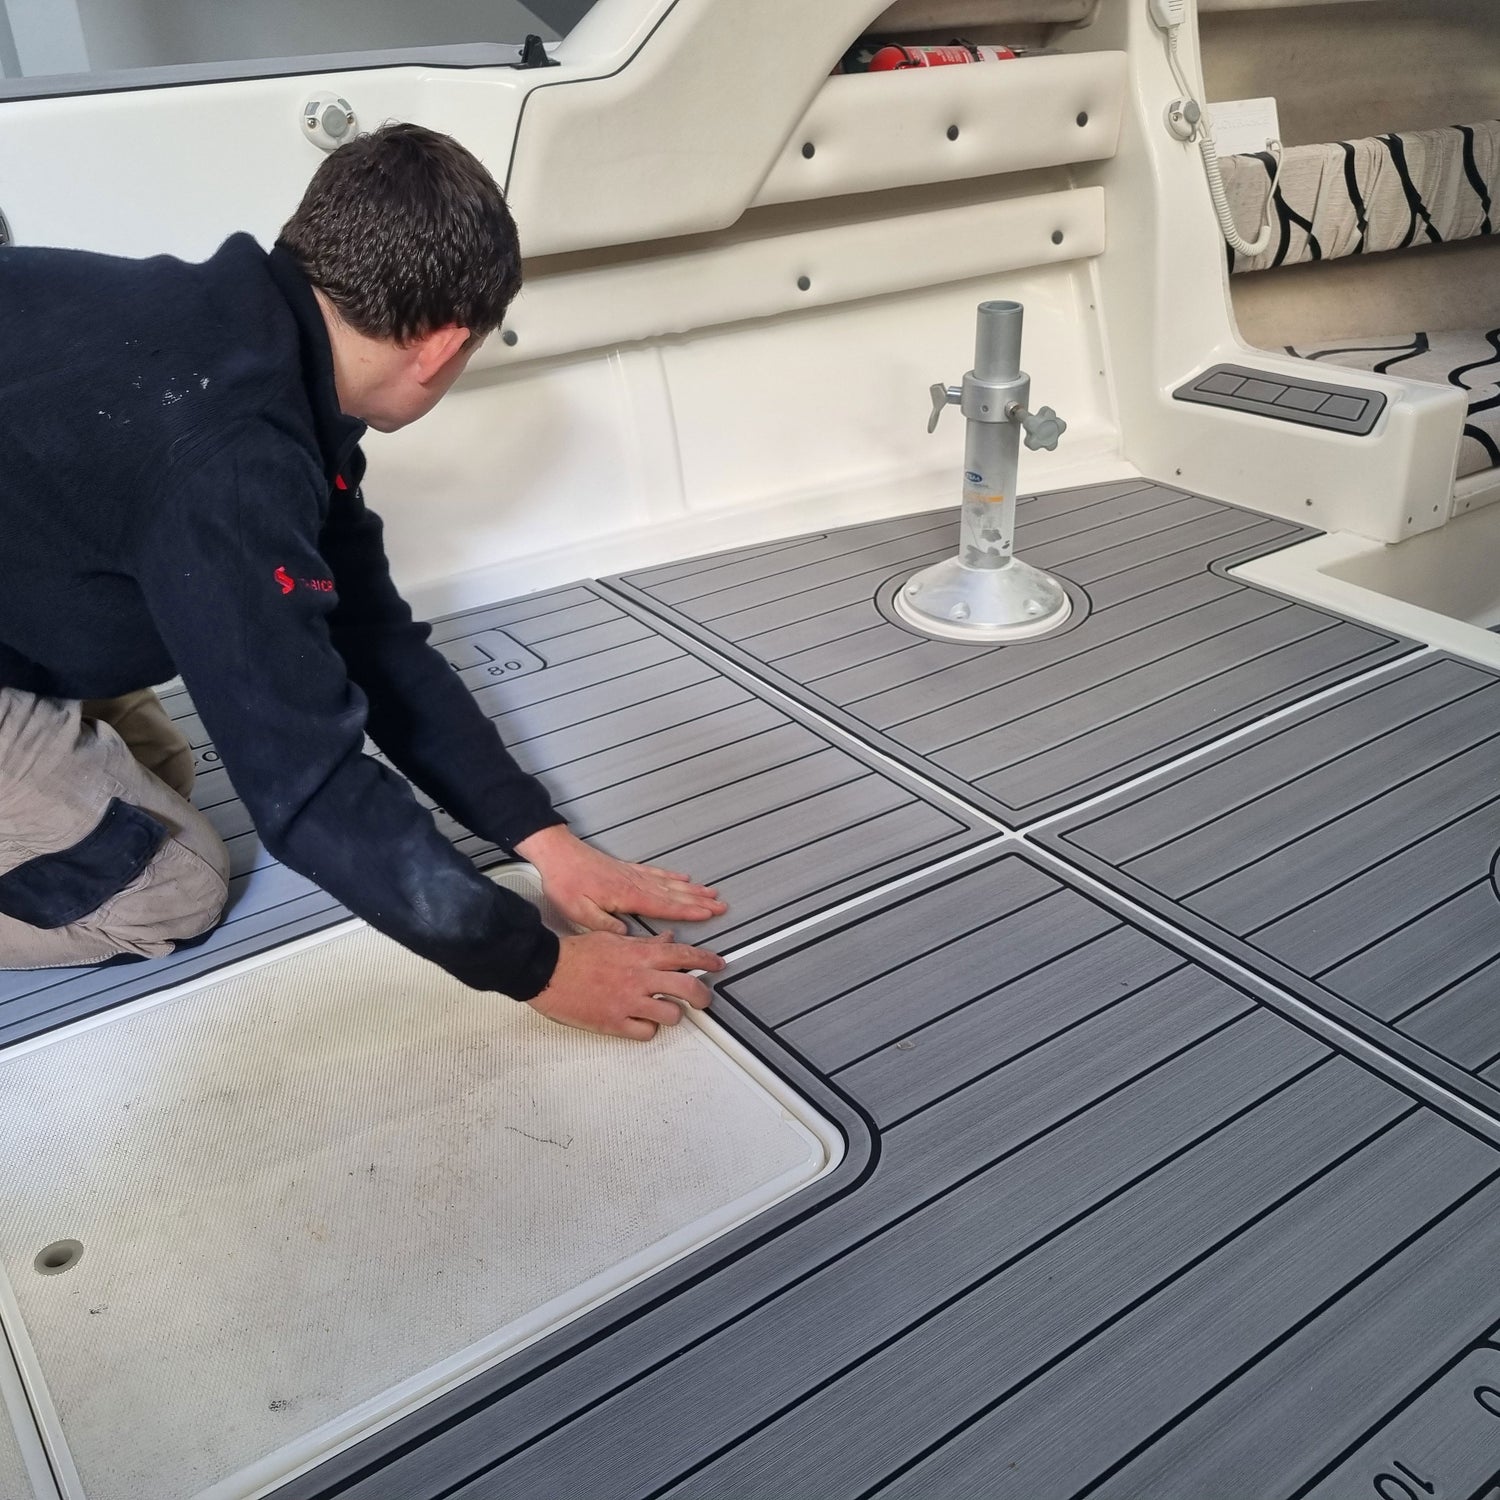
2.5 Lay the Flooring
Carefully place the cut flooring material onto the adhesive - coated surface. Start from one end and slowly unroll or lay it down, smoothing out any air bubbles or wrinkles as you go. Use a roller or your hands to press the flooring firmly into the adhesive, ensuring good contact. For seams between pieces of flooring, overlap them slightly and use a utility knife to trim the excess material for a seamless look.
2.6 Trim and Finish
Once the flooring is laid, use a utility knife to trim any excess material along the edges of the boat. Pay close attention to areas around hatches, seats, and other fixtures, making sure the flooring fits snugly. If there are any gaps or uneven edges, you can use trim pieces or edging strips to give a finished look.
3. Post - Installation Tips
3.1 Allow Proper Drying Time
Give the adhesive sufficient time to dry completely before using the boat. This can take anywhere from 24 to 48 hours, depending on the type of adhesive and environmental conditions. Avoid walking on the new flooring or placing heavy objects on it during this period.
3.2 Maintenance
To keep your boat flooring looking its best and lasting longer, establish a regular maintenance routine. For EVA foam and PVC vinyl, simply wipe up spills promptly and clean the floor with a mild soap and water solution. Marine carpet may require more frequent vacuuming and periodic deep cleaning to remove dirt and stains.
By following these steps and tips, you can successfully install boat flooring that not only looks great but also provides a comfortable and functional surface for your boating adventures. Whether you're a DIY enthusiast or a seasoned boat owner, this guide will help you achieve professional - quality results.

Jimmy, two easy options:
Full re-glue → 3M 5200 marine glue, best against sun & salt water.
Small loose edges → 3M marine double side tape.
Don’t use regular glue, it dries and falls off fast again. Clean old glue off first!
Should read EVA foam
Adhesive has dried out, released the evaluation foam. What adhesive do I use to re-stick the decking?
Adhesive has dried out, released the evaluation foam. What adhesive do I use to re-stick the decking?